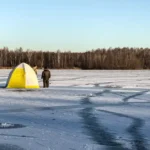
Venturing out onto frozen lakes and rivers for recreational activities like ice skating, ice fishing, or winter hiking can provide enjoyment during cold weather months. But traversing ice inevitably poses risks. Falls through weak ice can lead to frigid immersion, hypothermia, or even drowning. So, properly assessing conditions and following ice thickness guidelines is crucial before stepping onto any frozen body of water.
How thick does ice need to be to walk on safely? The commonly recommended minimum ice thickness for an individual to walk on is 4 inches. However, many experts advise waiting until there are at least 5 inches of solid ice before venturing out and continuing to drill test holes frequently to verify safe conditions. The ideal ice depth for walking is 8 inches.
This in-depth article provides vital information, tips, and background on determining safe ice thickness, recognizing warning signs of unstable ice, essential safety precautions, and what to do if you unexpectedly fall through thin ice.
![How Thick Does Ice Need to Be to Walk on Safely? [safe ice thickness]](https://fishingsaga.com/wp-content/uploads/2023/11/Untitled-design-10_result-1024x536.webp)
Ice Safety Fundamentals
For outdoor enthusiasts in northern climates, ice skating, cross-country skiing, ice fishing, snowmobiling, or even driving on frozen lakes may seem like appealing cold-weather pursuits. A pristine frozen lake or river covered in fresh snow can paint a serene winter scene. But venturing out onto ice should always be done cautiously.
Falling through weak, thin ice into frigid waters can quickly become terrifying and life-threatening. Sudden immersion initiates the rapid onset of hypothermia. Being trapped under solid ice layers prevents reaching the surface. And disorientation combined with limited time for self-rescue leads to drowning. According to the Canadian Red Cross, no natural ice should ever be considered completely “safe ice.” Conditions can vary widely across a single frozen lake or pond. Factors like water depth, size of water body, chemical composition, snow cover, and microclimates prevent uniform ice formation.
So, it’s essential to continually check ice thickness and be aware of hazard signs before leaving shore. Don’t let the picture-perfect winter wonderland appearance lure you into a false sense of security. Exercising caution and respecting the inherent risks of ice is imperative.
This article provides thorough coverage of recommended guidelines and best practices for safer outdoor ice activities. Topics include:
- Ice thickness requirements for different activities.
- Techniques for testing and measuring ice depth.
- How to recognize potentially dangerous ice conditions.
- Essential safety tips and preparations.
- What to do if you fall through thin ice.
- Additional resources for further learning.
With proper precautions and thoughtful decision-making, you can more safely enjoy the beauty of frozen lakes and rivers during cold weather months.
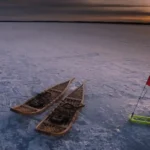
Ice Thickness Guidelines Depending on Activity
Determining if ice is thick enough to support your intended activity is the first key step in assessing safe conditions. Thickness guidelines can vary based on different factors:
General Thickness Guidelines
As a general rule:
- 2 inches or less – Only safe for ice skating by a person
- 4 inches – Can support an individual walking without equipment
- 5 inches – Generally safe for small groups spaced widely apart
- 7-8 inches – Supports snowmobiles or ATVs with an average weight of 800 to 1000 pounds
- 8-12 inches – Considered safe for most cars and light trucks
- 12-15 inches – Can support heavier vehicles up to 10 tons
- 15+ inches – Safe for large vehicles weighing over 10 tons
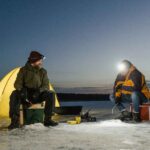
Thickness for Ice Fishing
For ice fishing shacks or huts:
- 5-7 inches – Safe for one person fishing in a hut
- 7-12 inches – Safe for 2-3 people spaced apart in separate huts
- 12-15 inches – Allows groups of 4-6 people gathered in a large hut
Thickness for Skating Rinks
Manmade skating rinks are specially constructed to allow skating at just an inch or two of ice depth. But for naturally frozen ponds and lakes:
- 4 inches – Provides a margin of safety for individual skaters
- 5 inches – Allows small groups of 2-3 skaters spaced apart
- 6 inches – Safe for pickup hockey games with 4-5 skaters at a time
- 8+ inches – Supports large groups of 15-20 skaters gathered together
Vehicle Ice Thickness Guidelines
Driving cars and trucks over frozen lakes requires the following:
- 7.5 inches – For a small car, about 2 tons gross weight
- 8-10 inches – Safe for midsize sedans or light pickups up to 5 tons
- 10-12 inches – For SUVs, vans, and loaded trucks, around 6-8 tons
- 14-18 inches – For 8-10 ton vehicles like snowplows or ambulances
- 20+ inches – Capable of supporting loaded semi-trailer trucks over 15 tons
So, as a basic rule of thumb, add 4-6 inches minimum beyond the vehicle’s gross weight in tons. Of course, exercise additional caution with larger trucks.
Adjusting for Different Ice Types
These standard numbers are basic guidelines for solid blue ice formed by long-sustained freezing temperatures. However, other less stable ice types require adjusting thickness accordingly:
- White ice or “snow ice” – Formed by a layer of snow building up on blue ice. Snow’s insulation effect prevents further thickening of the underlying ice. Add 1-2 inches minimum.
- Gray ice – Indicates thawed, then refrozen ice. The weaker bond between ice crystals forms a dull, grayish color. Add 2-3 inches.
- Layered ice – When sudden warming and cooling forms layered sheets. It can leave air pockets that prevent bonding. Add 2-3 inches.
- “Rotten” ice – Decaying ice near the end of winter. Appears mottled and porous. Avoid going on any questionable decaying ice.
So, ice composition and appearance affect actual strength. However, the guidelines provide a starting framework to make safety judgments based on conditions.
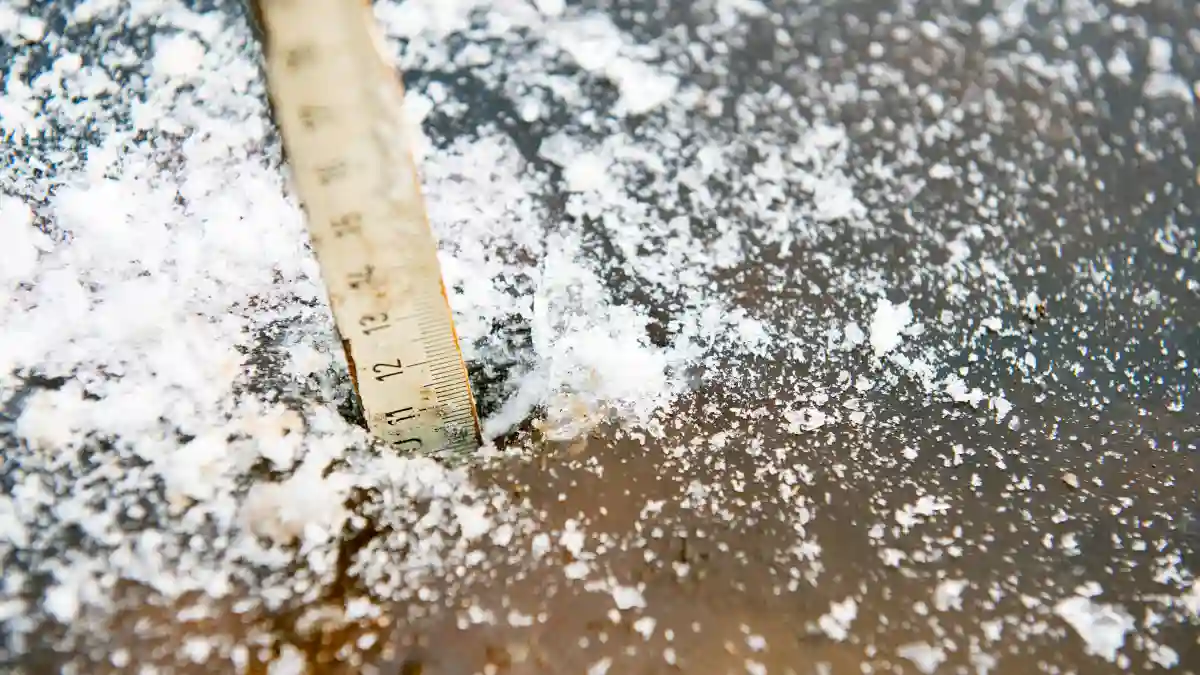
Techniques for Testing Ice Thickness
While thickness charts offer general baselines, you can’t judge the actual ice safety at a location by appearance alone. It is highly recommended to physically test and measure the ice depth before extensive walking or other activities.
Checking thickness as you go is even more critical in early winter when ice is still forming. Late winter decay also demands vigilant monitoring.
Methods for directly measuring ice depth include:
Drilling Test Holes
- Use an ice auger, specialized drill bit, or hand drill to penetrate the ice and take measurements.
- Powered ice augers allow the drilling of holes quickly and efficiently. Manual hand augers are still effective but require more effort.
- Drill holes every 30-50 feet as you progress to verify consistent thickness.
Cutting with an Ice Chisel
- Sturdy steel ice chisels with long sharp blades can cut into ice to enable measurement and create test holes.
- Strike firmly with a heavy hammer or mallet to penetrate through.
- Cut a slot or trench versus just a hole to better gauge thickness.
Consulting Local Authorities
For frequently used frozen lakes, consult your municipality or recreation authority. Many localities perform frequent professional measurements.
- Trained technicians use specialized power augers and equipment to monitor ice depth across high-traffic areas.
- Public agencies often post current ice thickness reports online or at access points.
- Following fresh snowfalls, authorities will check for any reductions in ice thickness.
So before heading out, research if official ice depth measurements are available for the desired frozen lake or pond.
Checking Consistency Across Area
Regardless of technique, check thickness at regular intervals across the span you intend to traverse. Don’t assume it’s uniform.
- Take measurements along the anticipated path as you walk further distances.
- Drill test holes from shoreline edges, mid-sections, and interior areas.
- Also, take depth readings at any cracks, pressure ridges, discolorations, or other anomalies noticed.
Consistency in ice formation is rare. Continually verifying adequate thickness as you progress is a vital safety practice.
How to Identify Potentially Dangerous Ice
In addition to measuring thickness, evaluating the physical appearance and surrounding conditions provides further clues to hazardous areas. Be extremely cautious or avoid entirely any ice that shows:
Cracking Patterns
- Any signs of cracks, fissures, or splitting apart indicate unstable ice formation.
- Sounds of loud popping or cracking warn of shifting stresses.
- Even hairline stress fractures reduce overall integrity. Don’t venture onto any visibly cracked sections.
Flowing or Moving Water
- Avoid areas near inlets or outlets with flowing water underneath. Moving currents prevent solid freezing.
- Features like springs or rapids entering a lake lead to thinner ice cover.
Deterioration and Rotting Ice
- Ice that appears mottled, porous, or honeycombed signals decay.
- A dull white color versus clear blue indicates melted and refrozen ice.
- Later, winter ice also becomes soft and slushy along shorelines early.
- Leave the area if you see any indication of deterioration or thawing.
Grayish Coloring
- A grayish hue, versus a dark blue shade, alerts weaker ice bonds.
- It can indicate melting and refreezing from heat waves or heavy rain.
- Grayish or opaque color is never as structurally sound as clear blue ice.
Abnormal Textures
- Odd contours, jagged ridges, or inconsistent surfaces may have gaps underneath.
- Protrusions above the norm likely reflect irregularities below.
Recent Warming Trends
- Sustained above-freezing temperatures or excessively warm days degrade ice integrity through melting and softening.
- Even if cold returns, the damage weakens the ice formation.
- Research weather trends for the weeks prior to assessing impacts.
Heavy Snow Accumulation
- Thick snow buildup insulates the ice from further thickening as it’s forming.
- Weight can depress ice, but fresh snow conceals these dangerous depressions.
- Flooded snow can also turn to unstable slush on top of thin ice.
Areas With Vegetation
- Aquatic vegetation impedes water from freezing solidly in those areas.
- Plants release heat energy up through the ice, preventing thickness.
- Grass, reeds, logs, or docks conduct warmth, diminishing integrity.
Moving Waterways
- Rivers, creeks, culverts, or storm drains create turbulence undermining ice formation.
- Currents or flow beneath the surface erodes edges and stops solid freezing.
- Sections downstream often have thinner, weaker coverage.
- Avoid any areas within 100 feet of moving water access.
Pressure Ridges and Domes
- Wind and water currents cause ice sheets to collide, forming dangerous ridges and upheavals.
- Avoid these formations where broken shards may be pushed downward unevenly.
Dark Spots and Openings
- Patches of darker ice signal thin spots vulnerable to breaking through.
- Cracks or gaps where water is visible above require a wide berth.
- Open holes or bore holes from fishing warrant thick ice surrounding them.
Near Shore Weakness
- Ice forms slower and thinner along lake and pond shorelines early and late season.
- Gradual slopes create shallower waters along banks.
- Look for bluish tint versus whitish ice near shore.
High Traffic Areas
- Main access points see excessive foot traffic that deteriorates ice integrity over time.
- Vehicular use cracks ice even where the thickness was originally adequate.
- Stick to lesser-used routes onto the frozen surface.
Salt Water Considerations
- Saltwater freezes more slowly than freshwater lakes and rivers.
- Salt prevents solid, thick ice formation, requiring doubling thickness rules.
- Tides cause shifting, which prevents uniform freezing.
So inspect the ice carefully for ominous signs and avoid areas with higher hazard indicators. Prudence demands avoiding any questionable sections.
Essential Ice Safety Preparations and Precautions
Don’t venture onto potentially unstable ice without taking proper safety precautions beforehand:
Have Emergency Gear and Tools Available
- Ice picks – Like miniature mountain climbing crampons to grip ice if you break through. Strapped to wrists or worn around the neck.
- Ropes – 50 feet of rope provides reach if someone falls in and needs extraction.
- Ring buoys or throw bags – Aid with tossing rescue lines to victims.
- Ice awls – Handheld spikes to pull yourself up onto solid ice if partially submerged.
- Ice claws – Attached to special winter boots or shoes to aid in climbing out of frigid water.
Use the Buddy System
- Never go onto questionable ice alone. Having others with you means support if you get into dire straits.
- Ideally, have various self-rescue devices among different individuals for versatility.
- Space out 25 feet or more between party members for better weight distribution.
Inform People of Plans and Whereabouts
- Tell family or friends your destination, expected route, and return time.
- If overdue, search efforts can be directed to the right frozen lake or river section.
Know Your Route Off Any Frozen Surface
- Scope out your exit strategy for getting back to shore well in advance. Don’t assume you can return the same way you accessed the lake.
- Note any landmarks to aim toward land if you become disoriented.
Bring a Safety Throw Kit
- Combine ice awls, rope, ring buoy, flashlight, and whistle in a pack to have essentials together.
- Allows you to immediately deploy needed rescue devices.
Carry a Cell Phone or Radio
- Ensure fully charged battery and service availability before heading out.
- Phones or radios enable calling emergency contacts if in trouble.
Wear Proper Weather Attire
- Having insulated, waterproof outerwear and layers is critical for resisting hypothermia if plunged into frigid waters.
- Wool and synthetics stay warmer when wet versus cotton clothes.
- Cover extremities entirely to prevent rapid heat loss.
Stay Sober
- Consuming alcohol before traversing ice poses extreme risks.
- Impaired judgment, lack of coordination, and slower reactions put you in greater danger if ice fails.
Bring Collapsible Ladders
- Keep extendable ladder sections in vehicles to allow quick escape if ice gives way under parked cars, snowmobiles, etc.
- Allows you to pull yourself out of the hole and spread the weight on thicker sections.
Taking preventative steps goes a long way toward safer outdoor ice activities. Don’t let the urge for wintertime adventure put you in harm’s way due to lack of preparation.
Self-Rescue Tips If You Fall Through Ice
Despite all precautions, the risk of falling through weak spots exists anytime you venture onto frozen lakes and ponds. So knowing what to do if you end up in the frigid water can be a lifesaver:
Try Not to Panic
- Easier said than done, but panic leads to hyperventilation, which can hasten hypothermia.
- Stay mentally focused on deliberate escape actions despite the intense shock.
Get Horizontal on the Ice
- Use picks, claws, or elbows to immediately get the torso flat on the ice surface. This helps prevent entire body submersion.
- Splay arms wide and kick legs to elevate as much of the body as possible.
Move Toward Thicker Ice
- Once stabilized on the ice layer, crawl or slither away from the hole onto thicker sections capable of supporting your weight.
- Bringing rope or ladders can assist by spreading out the load.
Roll Away to Distribute Weight
- Once fully out of the hole, don’t stand up! This risks falling back in.
- Carefully roll your body away from the hole while horizontal to disperse the weight until it is at a very thick section.
Have Others Ready to Assist
- Teammates can throw ropes or ladder pieces and then pull those out of the water to safety once secured.
- Treat for hypothermia immediately once out.
Having rescue devices and knowing what to do can dramatically boost survival odds in the dire event you go through the ice. Don’t count on being able to think clearly in the moment. Prepare mentally ahead of time as part of essential safety planning.
Additional Resources for Ice Safety Awareness
Further expand your knowledge on ice hazards, thickness measurements, emergency preparations, and rescue techniques by consulting additional reference materials:
Online Resources
Print Resources
- “Winter Hiking and Camping” by Michael Lanza – AMC Books 2020
- “Essential Ice Safety” by Minnesota Department of Natural Resources. Available on Amazon.
- “Cold Water Bootcamp” by John Janszen. Downloadable ebook.
Instructional Videos
Local Community Outreach
- Fish and wildlife agencies in your region
- State park services and recreational councils
- Outdoor sporting goods retailers
- Cross-country skiing and snowmobiling associations
Connect with knowledgeable groups and experts in your community committed to ice safety education.
Conclusion
Although venturing onto frozen lakes and rivers allows great seasonal activities, safety must come first. Improper ice thickness assessment, unstable conditions, and lack of preparation lead to tragedy every winter. No one ever